


 |
| Shaping the Rudder using my favorite tool; the Stanley #140 skewed low angle block plane. The rudder is a single piece of mahogany. |
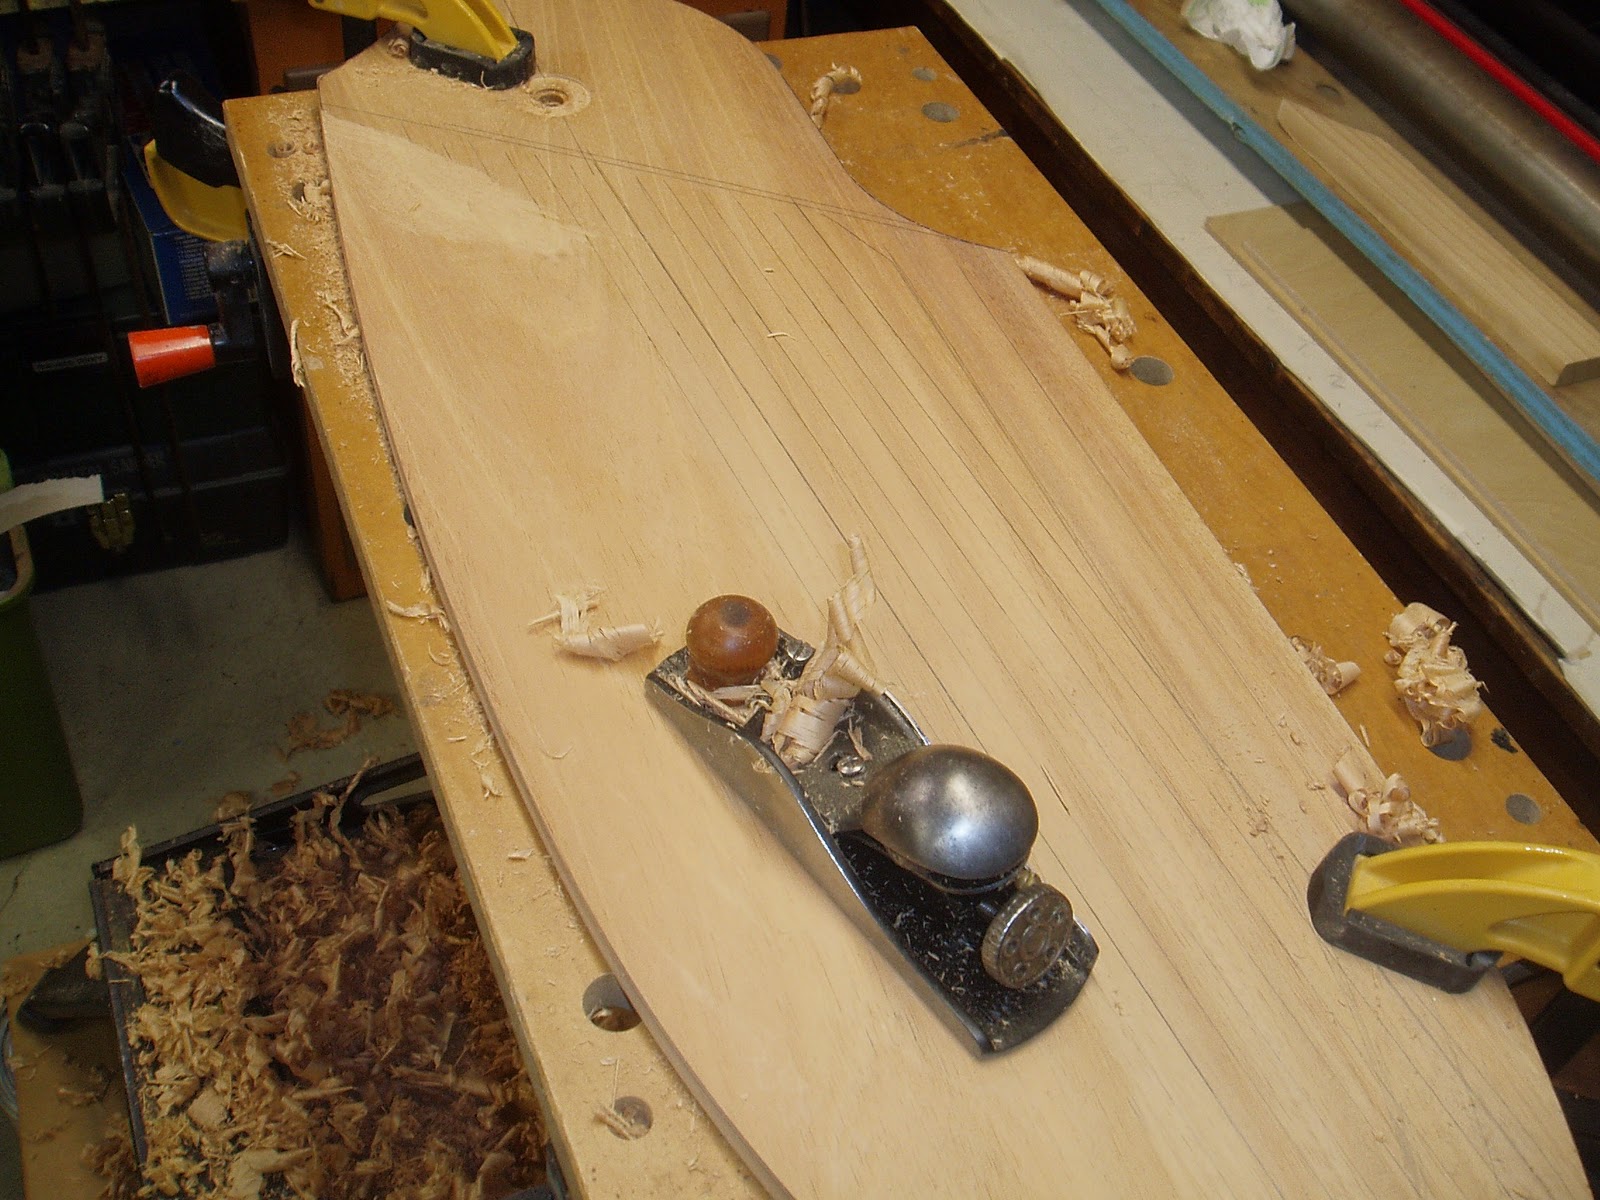 |
| Another shot of the Rudder. Note all of the shavings on the floor. |
 |
Completed Rudder and Rudder head. The Rudder is covered with fiberglass cloth using System Three laminating resin. Close up of the pivit for the Rudder. Note the bronze bushings on the Rudder Head and Rudder under the grey disk. The grey disc is a delrin washer to add spacing and provide a smooth surface for the Rudder to pivot against the Rudder Head to eliminate wood to wood wear. My rudder head is made of mahogany also. The outer cheeks are aprox. 9/16" thick. |
 |
| Mahogany and ash laminated tiller. |
 |
| Detail of Tiller handle. I practiced using my scarf jig on the top and bottom laminates which yielded this "mahogany grip" look. |
 |
| To make a standard Harken ball bearing block look like a wooden block, I made these mahogany pieces and epoxied them to the Harken block. The brass rivets are decorative, but peened from the back side to hold them in place. I aslo bronze plated the stainless on the Harken block using a kit from Caswell, http://www.caswellplating.com/ |
 |
| Another view,,, a dramatic change in appearance. |
 |
| Finished block and all the parts. Time will tell how this works out. |
 |
| Here is the router fixture that I used to cut a recess in the wooden pieces that will be laminated to the sides of the Harken block. Thew wooden piece that is outlined in black on the left, is the piece that will go into the fixture in the center of the picture. |
 |
| The piece to be routed in in the fixture now. |
 |
| The router guide is screwed in place. |
 | ||
| A Straight-Flat bit in the router used to make the recess in the side laminates to accept the Harken block.
|

 | ||
This is the piece after it is routed, The routed recess is sized to fit the outer shape of the Harken block. This piece will be cut to shape, drilled, and countersinks added. (see next pictures)
|
 |
| This is how I disguised a common seale deck plate to look like a wooden access cover. This way I get the good seal of the plastic deck plate, but the look of a mahogany cover. Detail pictures as follows. |
 |
| I turned the mahogany cover plates on a wood lathe. Kinda like turning a shallow bowl. |
 |
| Removing the mahogany plate fron the lathes backing plate. I used the planned mounting holes for the hand grip of the mahogany cover plate as a mounting to the backing plate of the lathe. |
 |
| Here are the parts. |
 |
| The fished product. |

Here are the various cleats that I made from Black Locust.
The Black Locust wood is very hard and weather resistant.

These 4 thumb type cleats will be used to retain the line loops on the rail bummpers.

The are the tufnol cam cleats for the jib sheets.
They are available at the Wooden Boat Chandlery here:

This is the pin that will hold the tiller to the rudder head.
See picture below,,,,

"E-Z Duzit", this is the name that I chose for my Penobscot 14.
Here is the start for the name mahogany badge that will mount to the inside of the transom.
This name represents a couple of important phylosophies for me durring the building
of my boat.
1. Durring the cunstruction of my Penobscot 14, this name was a constant reminder to take it easy, take my time, and don't get too overwhelmed or upset when things weren't going quite right.
2. The name was also derived from the fact that I wanted a nice easy boat to sail and row. This is why I did some modifications to the boat that included a wider beam by 6 inches and a hybrid sail plan that uses a slightly smaller version of the lug sail along with a small jib as used on the gunter rig. My lug sail is 67 sq.ft. and my jib 19 sq. ft. for a total of 86 sq. ft.

I cut the mahogany board into a ribbon shape and relief carved the folding ribbon shape. A good friend of mine cut the letters on his CNC machine.

Here is the finished product. I used dark stain inside the letters. To help hide the screws, I counter sank them and painted gold stars. The entire piece has about 6 coats satin clear spray.
Fantastic work! It's all in the detail and seeing the effort you clearly took on the pulleys etc I can only imagine the detail on the build itself. Well done again, what an inspiration to all other home builders of wooden boats. So, how does she sail?
ReplyDeleteShe sails great on all points of sail. Running down wind wing and wing is a joy. I put a reef in for high winds, and she seems to really like this. I get a lot of compliments on this sail rig set up.
Delete